Angled Polka Dots

okay...
so this post is the nail design up top there.
french tips with a bit of a twist!!
instead of a 20/80 straight line,
it will be a 50/50 angled line!!
(i keep typing 'angeled' instead of 'angled'.. fail much?!?!)
and.....
its going to have white polka dots!!
so!!!
let's get this started, shall we?
what you will need?
 base coat
 - OPI's "Nail Envy"
nail colour of your choice, preferably a bright playful colour.. for me - OPI's "Shorts Story"
white coloured polish - OPI's "Alpine Snow"
nailart stripe polish, similar to your nail colour choice.. for me - LA Colours "Metallic Pink"
top coat - OPI's "Top Coat"
cellotape
dotting tool

so.. once you have what you need, start by preparing your nails.
wash your hands, file it to a nice shape, cuticle treatment...etc...
I had to trim mine you see...
a few broke, chipped and it looked odd with like two perfect long ones..
looks like I have to wait a few weeks for it grow till I can do other cool designs!!
*sob*

anyway...
once your nails are prepared, apply base coat.
remember, base coating helps your nails look smoother and it also protects your nails..

while you're waiting for the base coat to dry,
carefully cut some cellotape and stick it onto the back of your hands.
after a bit, take it off and stick it back on again.
repeat until you feel the stickiness sort of gone but alittle still remaining.

when the base you applied dries, cut the cellotape so that it fits your nails and alittle over onto your skin.
stick it in an angel like the picture above.
stick it on gently making sure you get the bit where the nail and skin meet in between!!

when you're ready!!
apply your nail colour!!
yayy~
since you have the cellotape on, you don't have to worry about making mistakes!!
double yayy!!!
once the first coats dry, apply a second coat making sure you get the edges of the nails too!!

okay...
so while the second coats drying...
drop a few drops of your white nail polish onto a plastic surface.
(I'm using a shopping bag I got from JBHIFI.. shhh!! don't tell!!)
using your dotting tool, start making dots on the nails,
starting by the area where the tape is stuck on.
follow the diagonal line of the tape,
space the dots at resonable distance.

the dots should sorta look like this...
if you don't have a dotting tool, don't worry.
you can use your cotton bud!!
just dont forget to take the cotton off!!
or toothpick!!
just by cutting the ends of it to the size of the dots you want!!
or..
a blunt wooden pencil.
yep! that works too!!!
see?
you have nothing to worry about!!
you can transform your everyday things!! SIMPLE!!

once the white dots have dried, take the cellotape of slowly and gently.
the reason for this is because,
while appying your nail colour and the dots,
the polish might've gone underneath the tape, or the polish on the tape might've not dried yet.
if you don't take the tape off carefully the polish might smudge.
as you can see, my white polish smudged abit.
this could be a problem if you are planning to skip the next part and go straight to top coating your design..
however...
since I've made a booboo...
I shall turn to a striping nailart polish....
"HELP ME!! help me through this disaster oh mighty striping polish!!"

I have drawn lines just below the colour to cover up my mistakes~
yayy~
quite a neat polish to have actually.
the brush is long and thin making it easier to draw lines with..
once the stripe and the other colours are dry,
apply your top coat..
and well... after waiting for the top coat dry...
well then...
I guess thats it...
lol

that's the finished look.
I know terrible picture because of the glare from the light...
will do better next time...
gosh...
lol
the finished look looked great!!
the colour and design were cute and fun!!
a really nice pop of colour during the cold weathers we were having a few days ago in NewZealand..
boy, was that...brrrrrrr!!!!
this look I think suits any seasons!
Spring-Summer-Autumn-Winter
with the right colours too,
it should suit any fun events!!
or just a casual day/night out
or at home too...!!
heehee!!
as you can see,
with a different colour the nailart changes to a whole new different feel and look to it!!
by the way...
you can also use glitter nail polish instead of the striping polish to sort of hide the mistake.
like the orange one above.
(you can't really see it.. but its there....)
lol
if you don't think you can do it..
try!! and practise!!
like they say...
"Practise makes Perfect"
corny... I know... but its true!!
Well!!
have fun!!
and
Good Luck~

 (the back of the box)
 box is opened!! yayy~
 parts for the characters I think...
 ooh~ Guido!!
 look at his smile and cute wheels!! >_<
 Guido's got a screwdriver handy for Mcqueens next pit stop!!
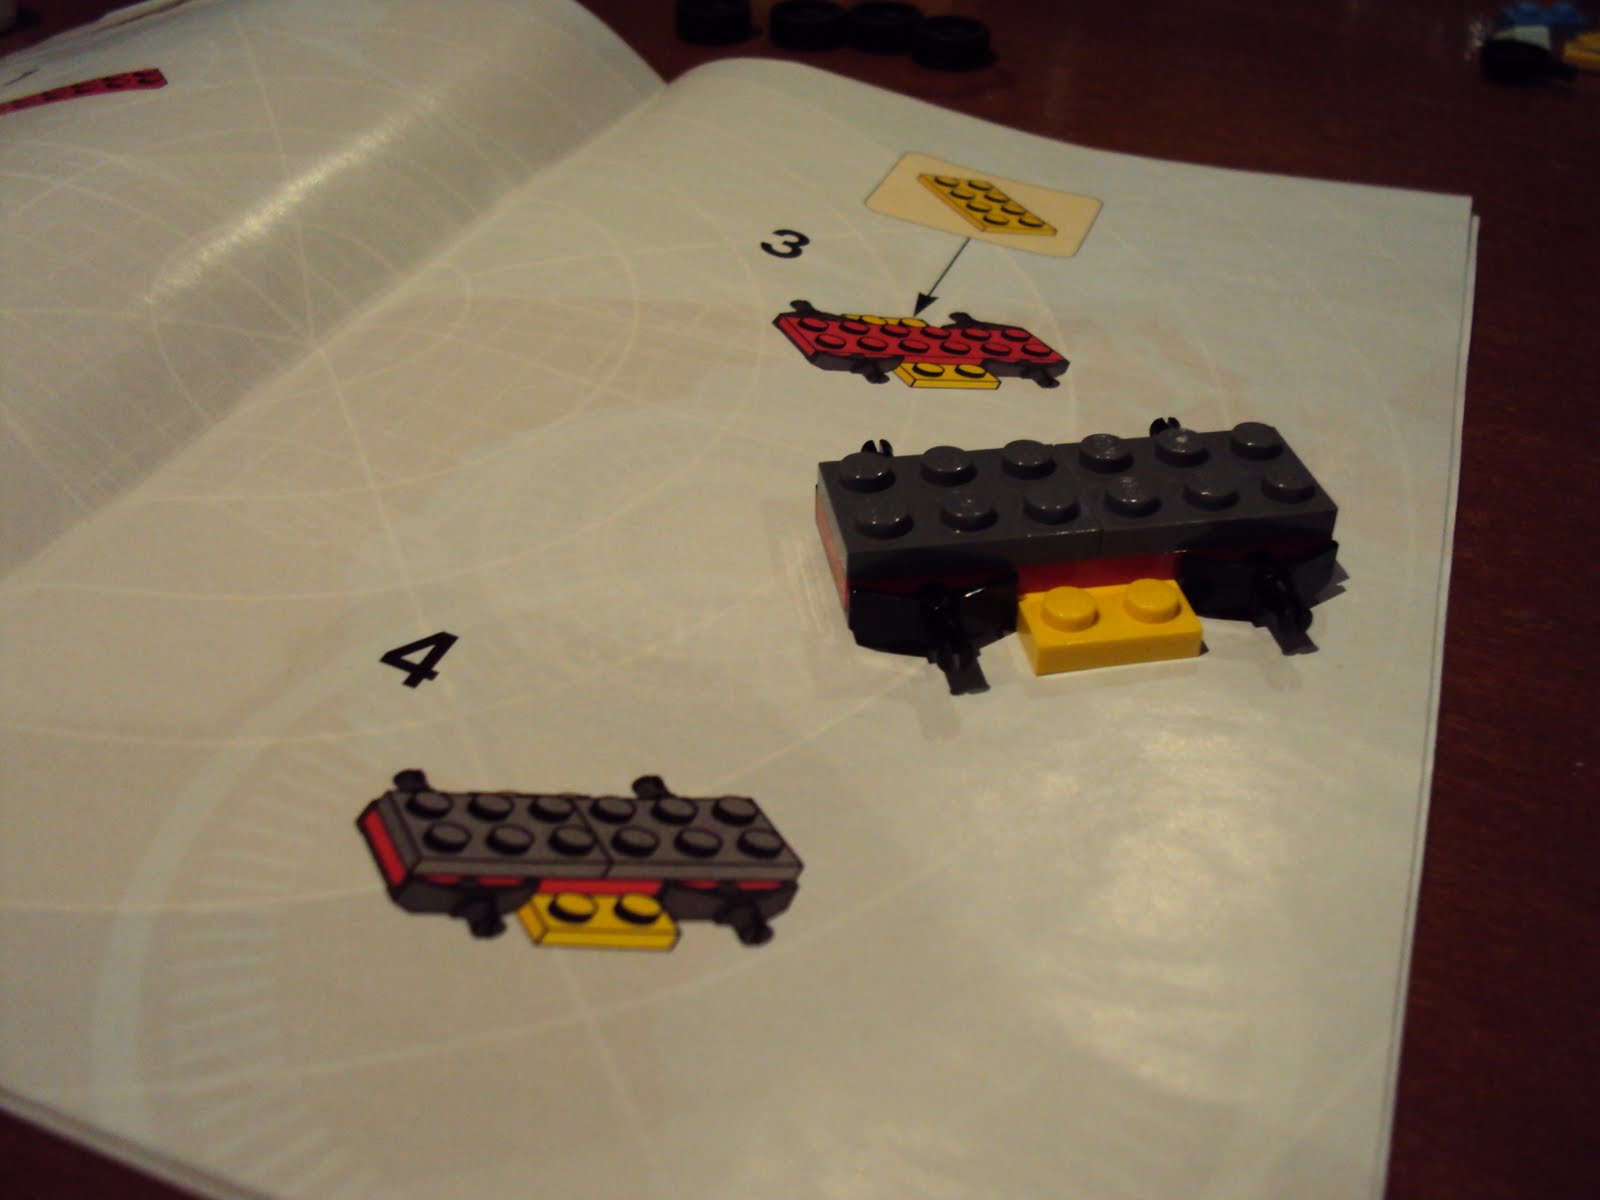 now... making Luigi~
 so much yellow!!!!

 Luigi!!
 the finished look of Luigi and Guido.
 hm... what are we making here?
 aah~ a fuel tank. yes..
 flag post!!
 now... what are we making here???
 posts....
 oh yeah!! Mcqueens place for his Pit stop!!
 the whole finished look for this Lego set.


